Up to now we’ve only really used a fishtail and a chisel. Once you start carving curves however, you’ll find that you will require more gouges. The basic idea is that you need to match the curve you want to carve to the curve of the gouge. That way the gouge does all the hard work of cutting a nice uniform curve but it does also mean that you will need more than just one gouge to carve efficiently. This is why woodcarvers end up with so many gouges!
For carving this O I am going to be using:
· 6mm chisel,
· 14mm No.3 Fishtail,
· Straight 16mm No.5 gouge


When looking at the direction you’re going to carve a curve, you need to take the grain direction into consideration. To ensure you’re carving with the grain, begin from the top and curve to a half way point of the O (see arrows on sketch)


Making stab cuts ensuring the gouge matches the curve exactly.

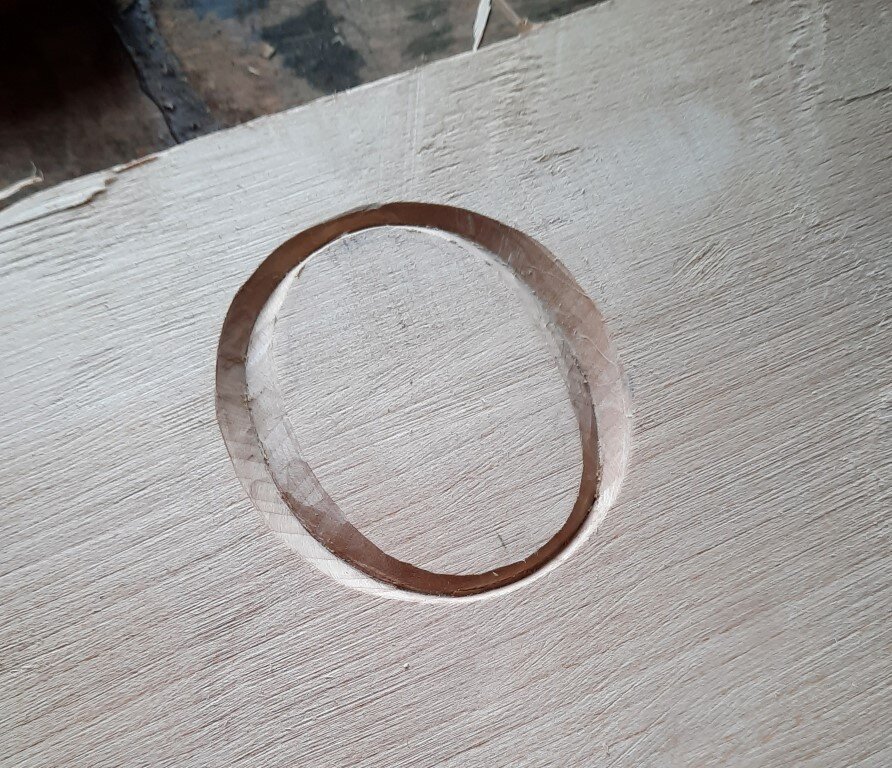
Central stab cut all the way around using three different gouges.

Starting to carve the outside curved straight towards the central stab cut.

Most of the outside curve removed.


Here you can see that I have stuck a printed O onto my wood using Spraymount. As with straights, the first step is to stab cut the central line. I end up using two different curves for this O, depending on the shape of your letter, particularly if you’re carving italics, you can end up using four or five gouges to match all the different curves withing a letter.
Once this is done I like to carve the outside edge going straight down towards the central line. I do this all the way round, making sure I switch to the corresponding gouge that I used on the stab cut.
I then use my flat chisel to very gently mark through the paper where the outline for the inside curve is going to come. You don’t have to do this but I find it helps so that when the paper starts to come away I have a record of where the line to should be. I often remove the paper myself once I’ve marked it and draw the line on with a pencil using the chisel marks as a guide.
If you do mark the line with your chisel, make sure you don’t hold the gouge straight up like you do when you’re making your stab cut. Angle it to match the angle you’ll be carving.
I generally only use the chisel for the middle section (which is the end grain) before switching to my fishtail. As with the serifs, I find the fishtail creates a nicer rounded cut to the inside edge.
This image shows the direction that I will be carving in to remain carving with the grain. As you can see, now I have the fishtail I have switched the angle I am carving. Rather than carving straight down like I did for the end grain. I angle the gouge so that one corner is following the curve that the stab cut created whilst keeping an eye on how much wood is being removed by the other part of the gouge.
Try and maintain a fairly low angle when carving this part, otherwise you’ll find it will start to dig into the wood rather than taking a nice thin slice off. Another common problem is that you forget to keep an eye on the corner that is supposed to be following the curve of the stab cut and this starts digging in to the outside edge. It’s key to maintain the angle throughout the cut and watch where you’re going!


As when carving the serifs, if you find there is a small ridge where the cuts meets, you can use your chisel just to smooth these over and blend them all into one uniform curve.
Vertical Grain
As a rule I always prefer to carving lettering into horizontal grain, however there are instances where this isn’t possible. On a few occasions when I’ve carved in situ, I have been carving with the grain going vertically e.g carving house names or numbers into oak posts.
The main thing to remember is that putting your serif stab cuts in FIRST is very important, otherwise the grain will want to run away when you start carving in the letter (see pic) This is particularly prevalent when working on courser grained wood like Oak or Chestnut, here I’m carving into Lime so it does it to a lesser extent but it still does it.

Without stab cuts at the top and bottom the grain will tear out following the grain.


The stab cuts made for the serifs stop the grain tearing out where you don’t want it to.
If you make sure you keep the angle the same throughout the cut, you can also carve the sides by carving along the length of the grain (see pic) rather than down towards the centre cut as you’d usually do with a horizontal grain.